How to create a gallery wall without damaging your dorm
Learn how to create a gallery wall without damaging your dorm with our step-by-step guide. Discover the best methods and materials to use.
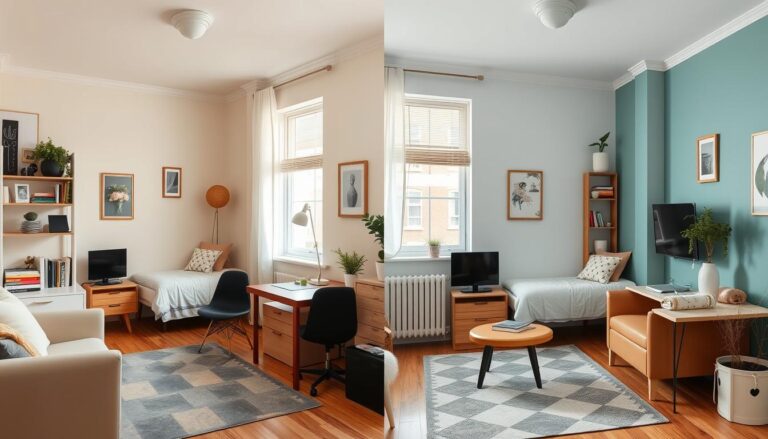
College living spaces often feel temporary, but that doesn’t mean they can’t reflect your personality. Many students hesitate to decorate their rooms due to strict housing rules about wall modifications. Strategic design choices allow you to showcase artwork and photos while keeping surfaces intact.
Professional organizers emphasize planning before hanging anything. Start by measuring your available area and considering lighting conditions. Removable adhesives and specialized hanging systems now make it possible to arrange multiple pieces securely. These solutions work on everything from drywall to cinder block surfaces common in campus housing.
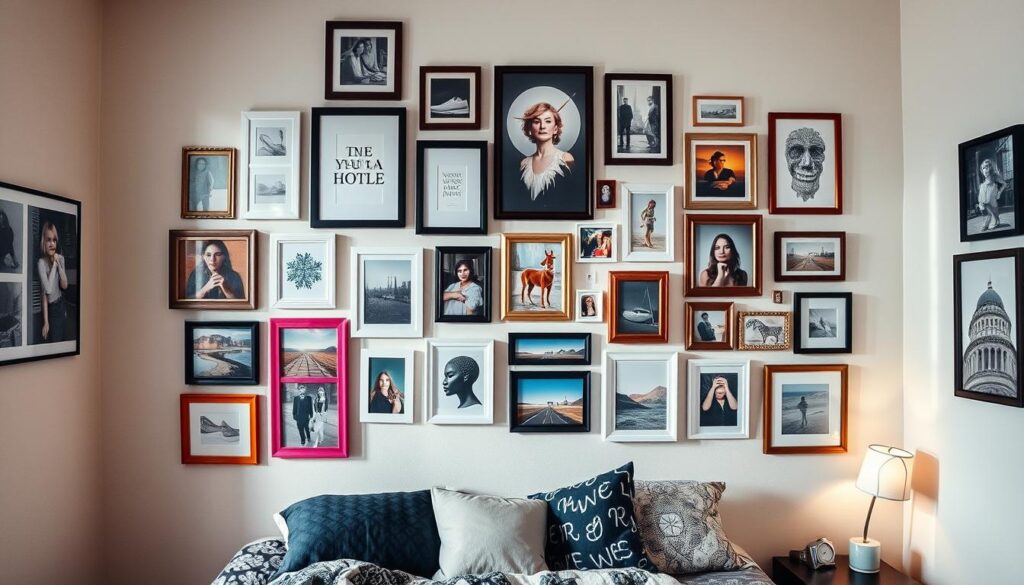
Curating a cohesive display involves balancing frame sizes and artwork styles. Mix personal photographs with affordable prints for visual interest. Lay out your arrangement on the floor first to experiment with spacing. This preparation saves time and reduces errors during installation.
Key Takeaways
- Modern adhesive products prevent permanent marks on rental walls
- Proper measurement ensures balanced visual compositions
- Testing layouts horizontally reduces installation mistakes
- Combining different frame sizes adds depth to displays
- Lightweight materials minimize stress on hanging systems
Understanding Dorm Room Constraints
Decorating student housing requires balancing creativity with practical limitations. Many college residences feature challenging surfaces like concrete or heavily textured walls that reject standard hanging methods. Strict policies against permanent alterations further complicate efforts to personalize spaces.
Recognizing Material Limitations
Concrete surfaces dominate most dorm rooms, making traditional nails and pushpins ineffective. Removable adhesives struggle on rough textures, often failing to hold frames securely. Fire codes add another layer of complexity by restricting flammable materials like certain tapes or wooden frames.
Space restrictions demand careful planning. Small wall areas require scaled-down arrangements to avoid overcrowding. Lightweight acrylic frames and fabric posters often work better than heavy glass options that stress mounting systems.
What Else Would You Like to Know?
Choose below:
Adapting to Rental Rules and Guidelines
Most housing contracts explicitly forbid holes or residue on walls. “Always test adhesives on inconspicuous areas first,” advises campus housing coordinator Maria Chen. This precaution prevents surface damage while confirming product effectiveness.
Command strips designed for concrete offer reliable alternatives when used properly. Weight limits per adhesive strip (usually 4-16 pounds) dictate frame size choices. Temporary solutions like washi tape or poster putty work for lightweight items but require frequent replacement.
Planning Your Gallery Wall
Successful displays begin with precision. Start by identifying your focal area using a tape measure. Note nearby furniture and electrical fixtures that might limit your arrangement options. This groundwork ensures your final composition feels intentional rather than haphazard.

Measuring Your Space Accurately
Use painter’s tape to mark boundaries on your floor matching your wall dimensions. This physical template lets you visualize proportions before committing to layouts. Account for permanent fixtures like light switches by marking their positions within your taped grid.
Designer Lisa Tanaka suggests, “Always measure twice – vertical and horizontal space require equal attention.” Record dimensions in a notebook or phone app for quick reference during installation.
Creating a Floor Layout for Arrangement
Place frames and artwork within your taped boundaries. Rotate items to find optimal orientations. Heavier pieces should anchor corners or central positions to maintain balance. Leave consistent gaps between items using cardboard spacers cut to 3-inch widths.
Snap photos from eye level to simulate wall viewing angles. Adjust placements until the collection feels cohesive. Number each piece’s backside and mark corresponding positions on your floor template for error-free transfer.
- Use grid paper for complex multi-frame arrangements
- Test sightlines from sitting and standing positions
- Swap out mismatched items during the planning phase
how to create a gallery wall without damaging your dorm
Blank dorm surfaces become creative canvases when approached thoughtfully. The right combination of artwork and hanging techniques lets you craft dynamic displays that respect rental agreements.
Selecting the Right Art and Frames
Lightweight materials prove essential for temporary installations. Opt for digital prints on foam board or fabric-wrapped canvases instead of traditional stretched options. For frames, consider these options:
| Frame Material | Weight | Surface Compatibility | Aesthetic Appeal |
|---|---|---|---|
| Plastic | 4-8 oz | All surfaces | Modern minimal |
| Thin Wood | 10-14 oz | Smooth walls | Warm texture |
| Metal | 6-12 oz | Concrete | Industrial edge |
Maintain visual harmony by repeating 2-3 frame colors. Mix square and rectangular shapes to add movement. “Group related items in odd numbers for natural balance,” suggests interior designer Clara Bennett.
Steps for Damage-Free Installation
Position your anchor piece 12 inches below ceiling level. Use painter’s tape to mark its placement. Attach the second-largest artwork diagonally opposite using adhesive strips rated for its weight.
Fill gaps with smaller items, maintaining 3-inch spacing. Test each mounting method on heavy books overnight before final placement. Rotate seasonal pieces to refresh displays without new adhesives.
Choosing Removable Materials & Tools
Transforming bland surfaces into vibrant displays requires smart material selection. Modern solutions combine strength with easy removal, letting students personalize spaces confidently.
Utilizing Command Hooks and Adhesive Strips
Command hooks adapt to various surfaces while protecting deposits. Their weight capacities range from 4-8 pounds, making them ideal for framed photos or string lights. Multiple hooks can share heavier loads when spaced evenly.
| Hook Type | Weight Capacity | Best For |
|---|---|---|
| Small Picture Hangers | 4 lbs | Posters, mini frames |
| Medium Utility Hooks | 5 lbs | Canvas art, wreaths |
| Large Decor Hooks | 8 lbs | Shelves, bulletin boards |
Adhesive strips work well for flat items like framed prints. Interior designer Rachel Torres notes, “Always press firmly for 30 seconds to activate the adhesive bond fully.” Remove vertically to prevent stretching.
Benefits of Peel and Stick Wallpaper and Decals
Removable wallpaper revitalizes concrete walls with patterns that hide imperfections. Test a 6-inch sample first to ensure proper adhesion. Use excess material to line drawers or cover desk surfaces.
Decals offer targeted decoration for appliances and furniture. Their repositionable nature allows for layout adjustments. Choose weatherproof varieties for bathroom surfaces or mini-fridge exteriors.
Creative Decoration Ideas for Dorm Gallery Walls
Your dorm walls can tell your story without a single nail. Strategic combinations of visual elements transform blank surfaces into meaningful displays that capture your journey. Balance personal significance with artistic flair to build a space that feels authentically yours.
Mixing Photos, Art, and Personal Mementos
Personal photographs anchor your display with emotional resonance. Layer framed family portraits alongside concert tickets or pressed flowers from meaningful events. Digital prints from emerging artists add professional polish while keeping costs low.
Interior designer Clara Bennett advises, “Odd-numbered groupings of related items create natural harmony.” Try clustering three small drawings from friends near a central art print. This technique blends memories with curated style.
Integrating Alternative Display Options
Break away from traditional frames with these innovative solutions:
- Clipboards for rotating photo strips
- Magnetic boards with interchangeable prints
- Floating shelves displaying ceramic pieces
Oval canvases or textile hangings add organic shapes to angular layouts. Binder clips paired with washi tape offer temporary mounting for lightweight items like postcards.
Designing with a Cohesive Color Palette
Unify diverse elements through intentional color choices. A neutral base of whites and grays lets vibrant accent pieces pop. Match washi tape patterns to your bedding or rug for subtle coordination.
Removable wallpaper in geometric designs creates a striking backdrop. This temporary solution adds depth while concealing wall imperfections. For seasonal updates, swap accent colors while keeping core neutrals consistent.
Conclusion
Personalizing your dorm space becomes effortless with the right approach. A thoughtfully arranged gallery wall transforms blank surfaces into vibrant reflections of your journey. Non-damaging methods let you experiment freely while keeping walls intact for move-out day.
Balancing creativity with practicality ensures your dorm room feels like home. Lightweight frames, removable adhesives, and strategic layouts protect surfaces without limiting style. These solutions maintain housing compliance while showcasing your favorite art or photos.
Refresh displays seasonally by rotating pieces or adding new finds. A cohesive color scheme ties diverse items together, creating visual harmony. With these ideas, your space evolves alongside your school experience – no permanent marks required.
FAQ
What materials are safe for hanging decor on dorm room walls?
How do I arrange a gallery wall without leaving marks?
Can I use wallpaper in a dorm room?
How can I mix photos and art without cluttering the space?
What’s the best way to hang heavy frames without nails?
Are there alternatives to traditional frames for dorm walls?
The Best Colors to Make Your Student Apartment Feel Bigger
» See exclusive tips for your home